Upload or draw freely
Upload a photo of the climbing wall or start from scratch.
AI automatically transforms your image into the Alpintopo visual style.
Approach, route line, belays, pitch grades, symbols and notes — drawn in your browser, in five steps. No drawing software, no scanner, no export dance.
Upload a photo of the climbing wall or start from scratch.
AI automatically transforms your image into the Alpintopo visual style.
Routes can be reviewed, improved and refined by the community.
Routes and approaches change over time — we keep them current.
Rappel points, bolts, pitons, trees and more.
All the symbols you need, always within reach.
AI helps simplify and speed up the editing process.
The result combines human collective intelligence with artificial intelligence.
Our topos are made to be shared and accessible to everyone.
They will always remain free — that’s our promise.
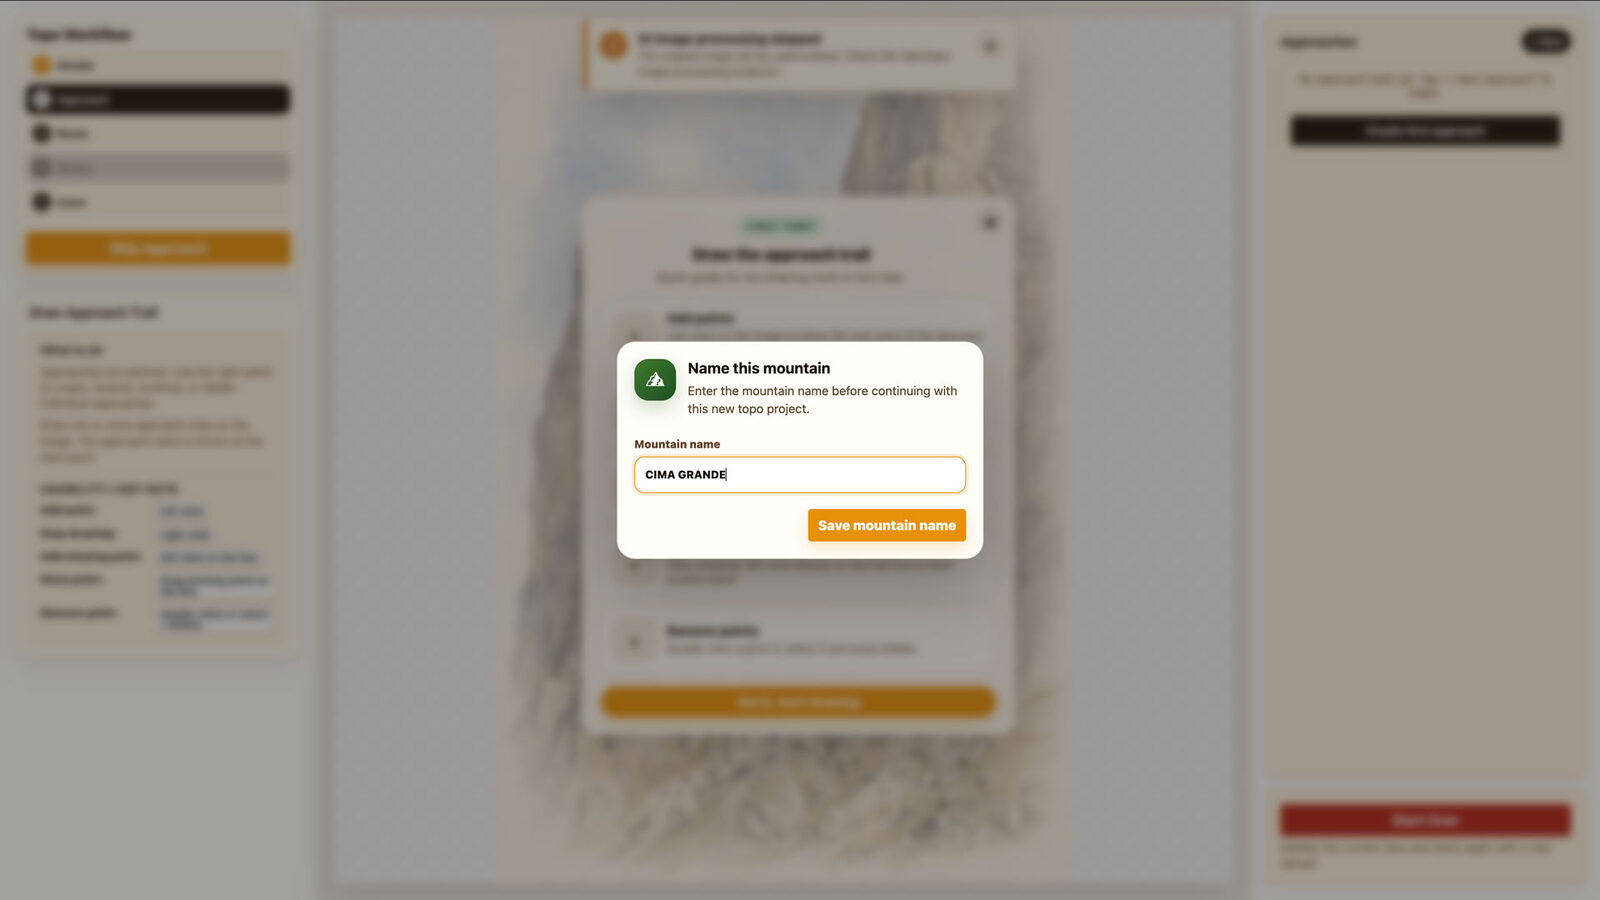
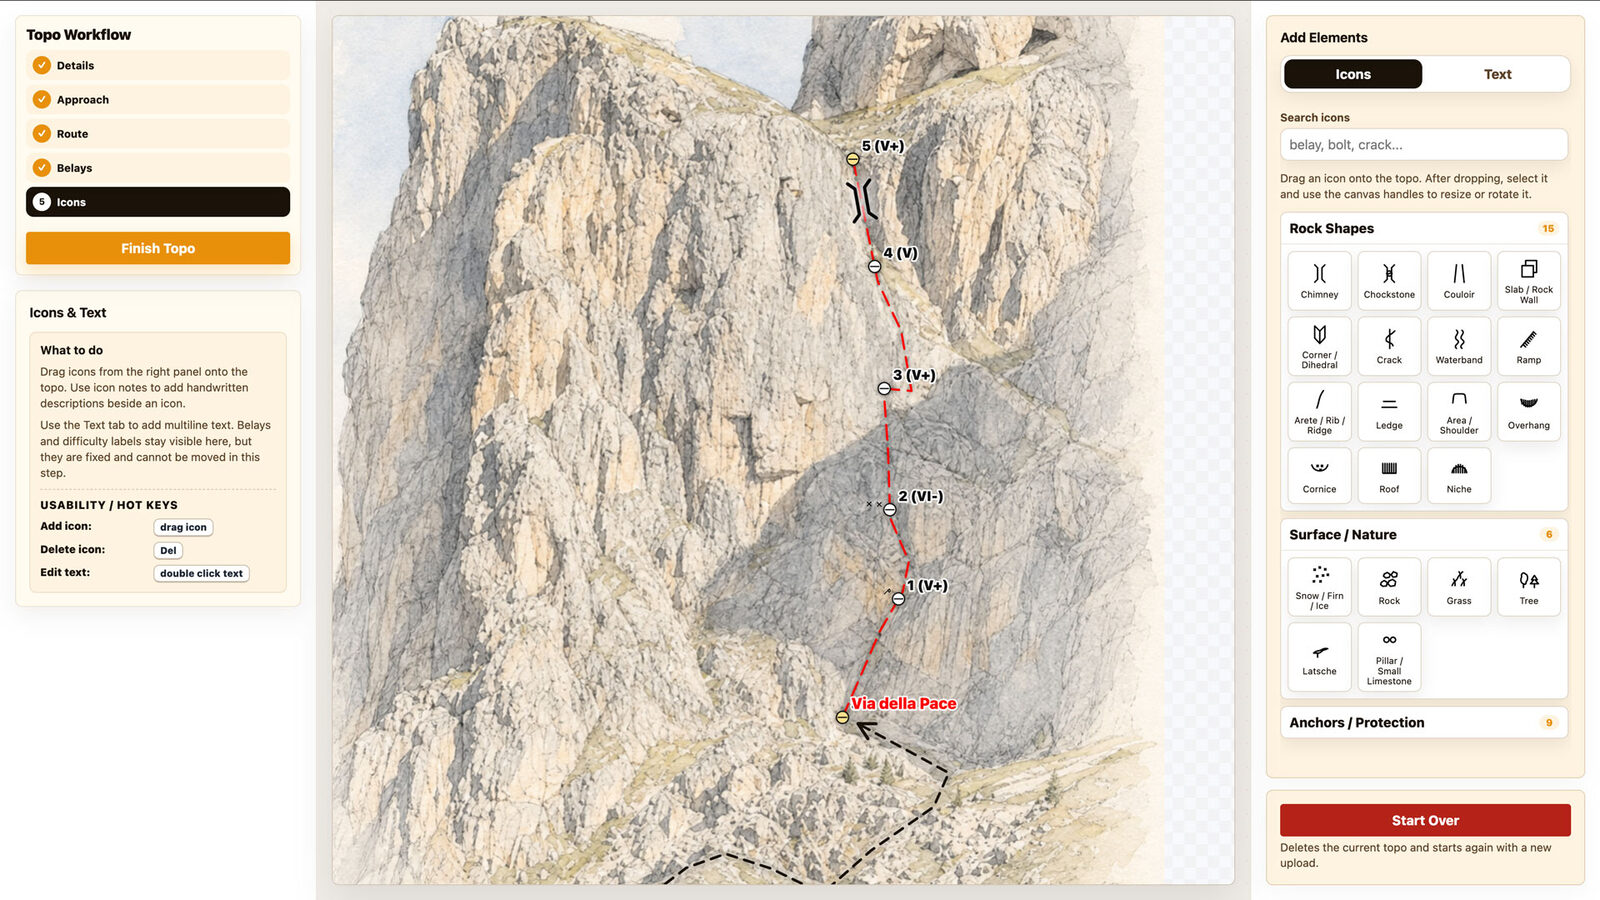
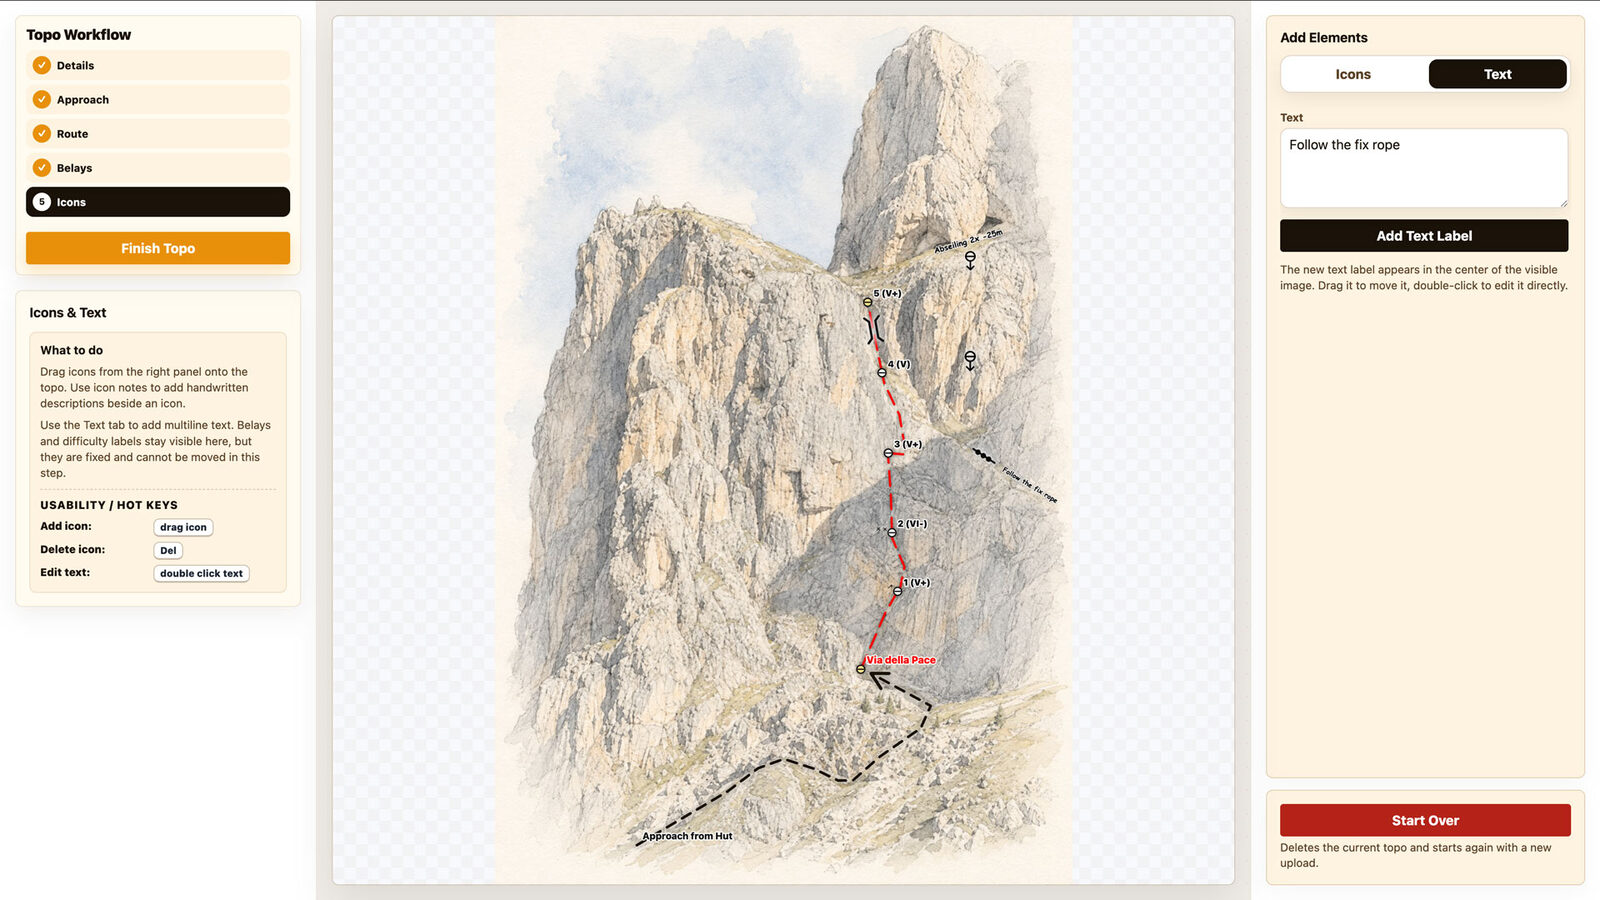
Upload the photo of the wall and name the mountain. The image is prepared automatically so the rock stays readable underneath everything you draw.
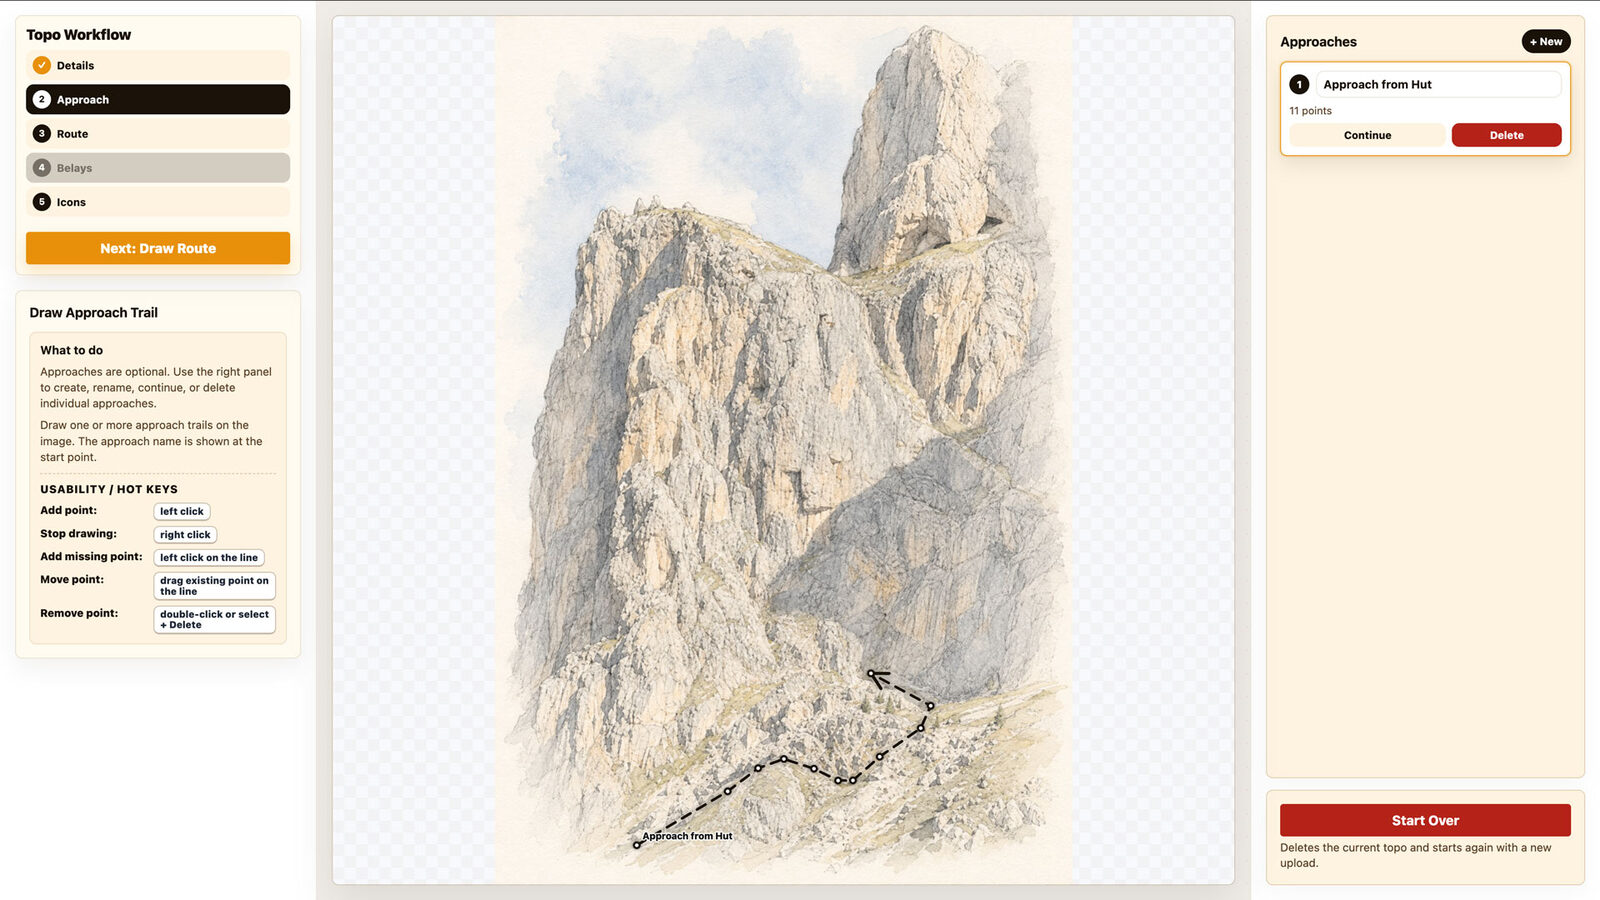
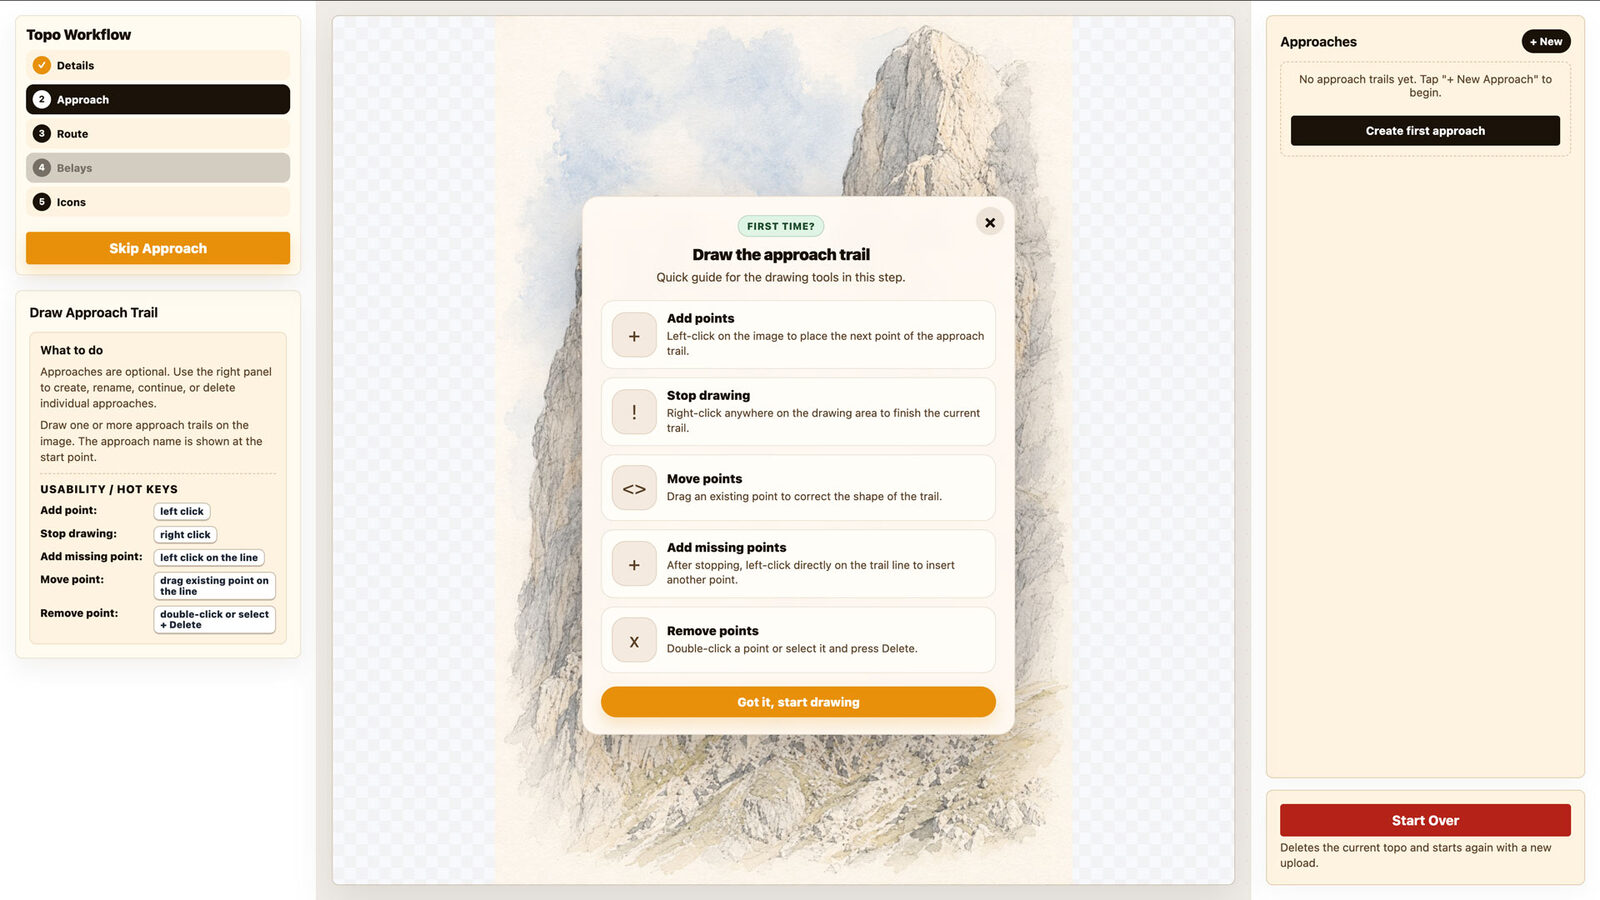
Draw how people get to the wall. Approaches are optional, and you can draw several — from the hut, from the car park — each with its own name at its starting point.
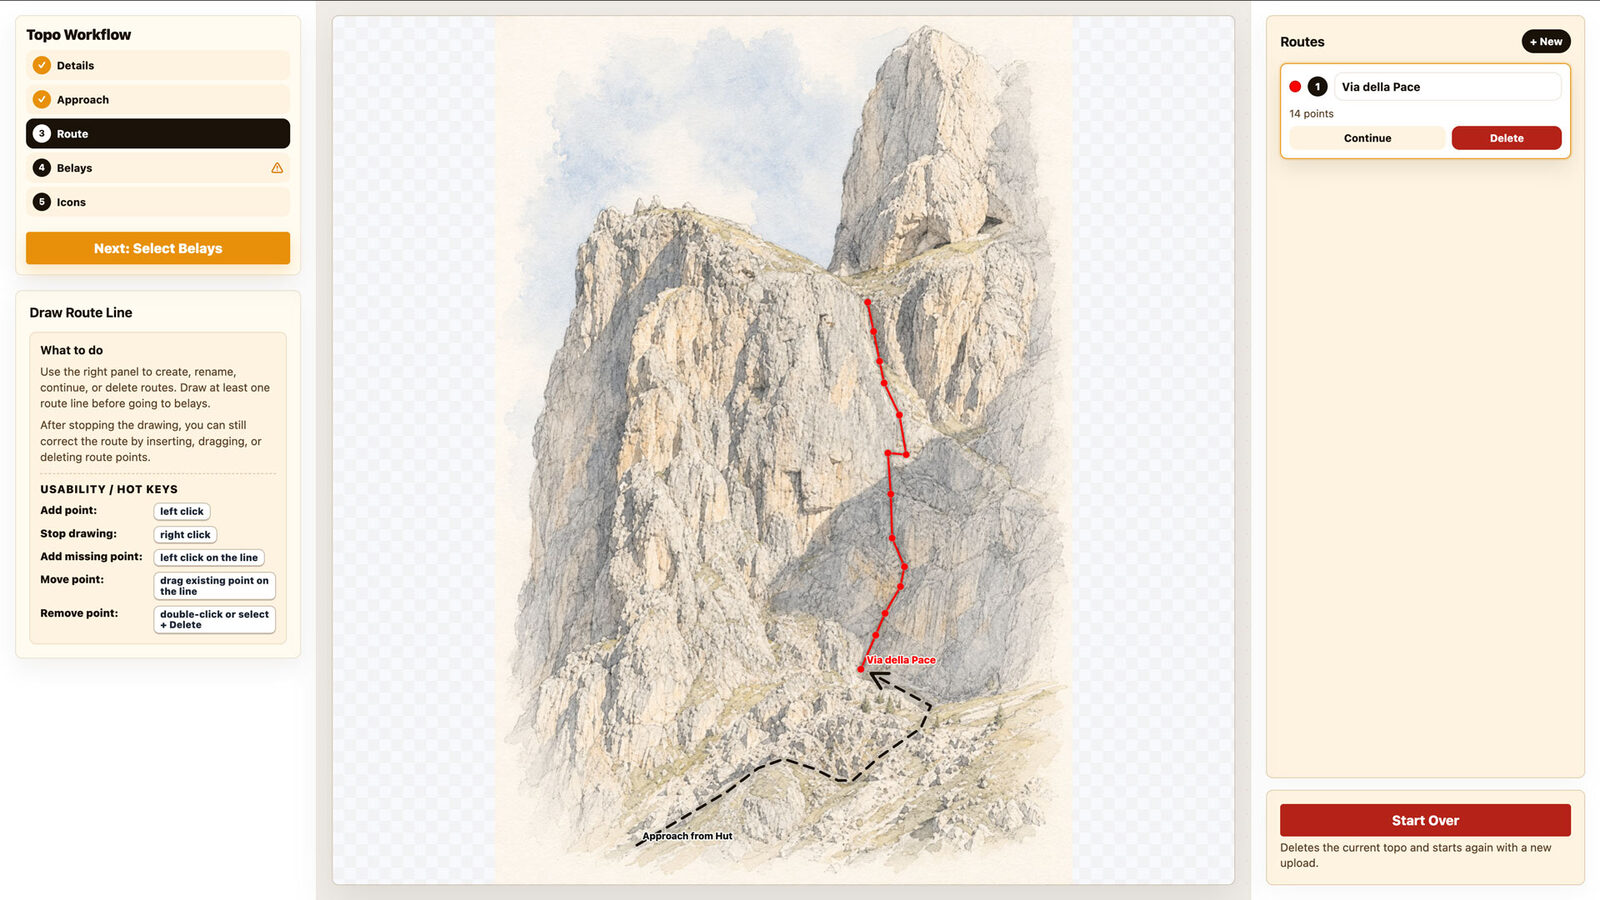
Trace the line up the wall. A topo can hold several routes, each in its own colour and with its own name, so neighbouring lines on the same face stay apart.
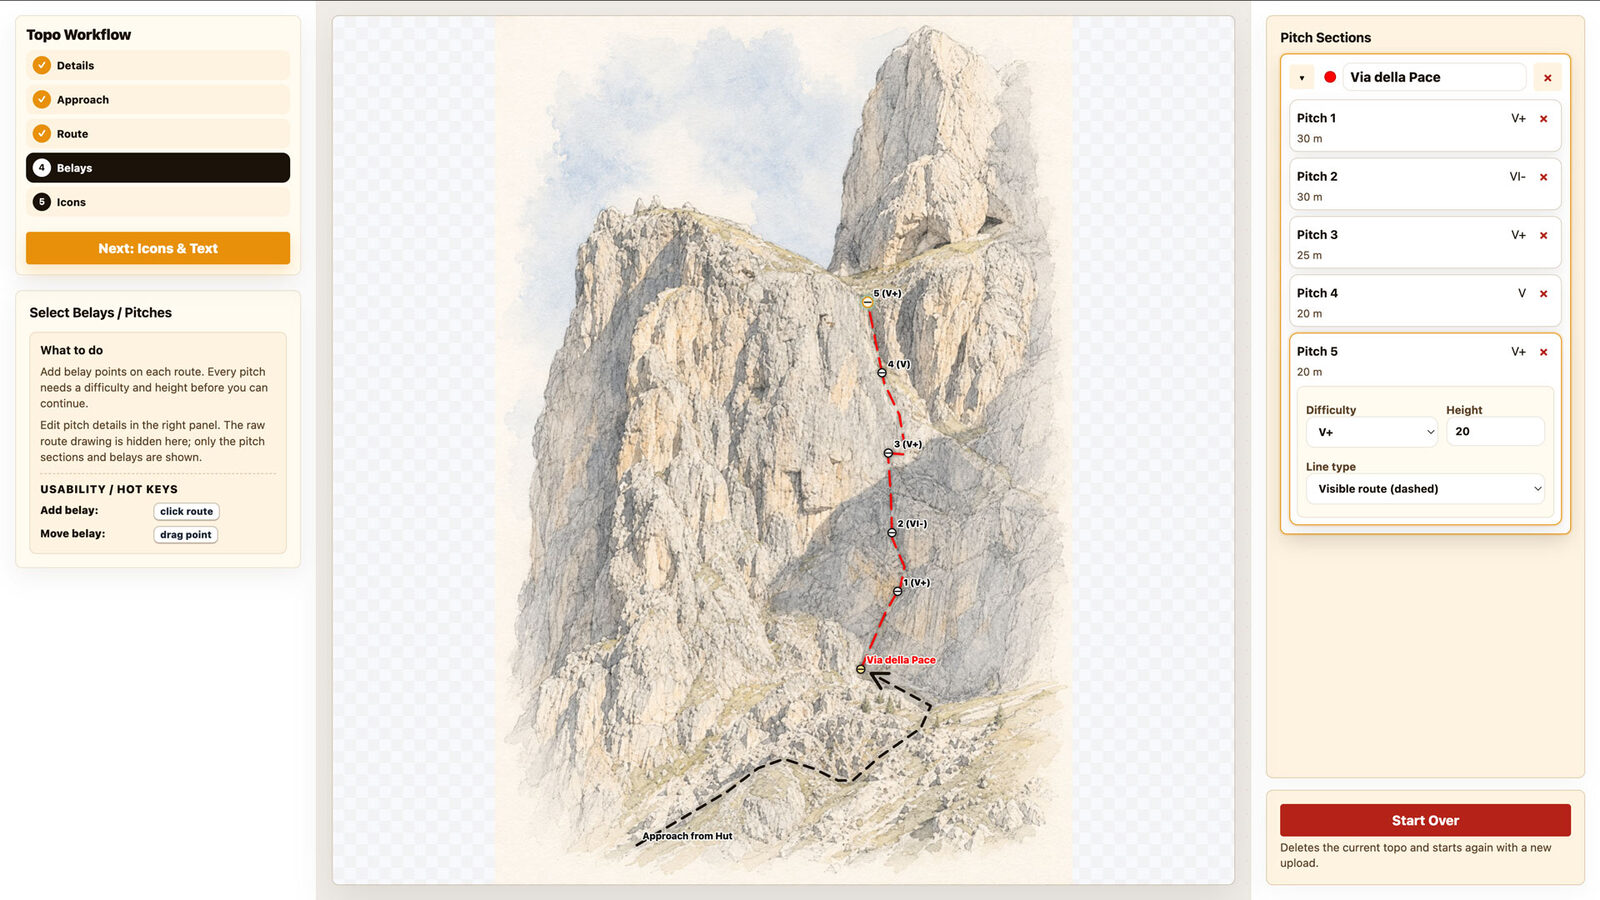
Click the route to place belays. The pitches between them appear on their own, and each takes a grade, a length and a line type — visible, hidden behind an edge, or a variation.
Drag symbols onto the topo for what the photo alone does not tell: chimneys, cracks, overhangs, ledges, trees, anchors and protection. Resize and rotate each one onto the feature it describes.
Labels carry the rest — a hint about a fixed rope, the abseil beta, a warning. Place them where they belong and double-click to edit.
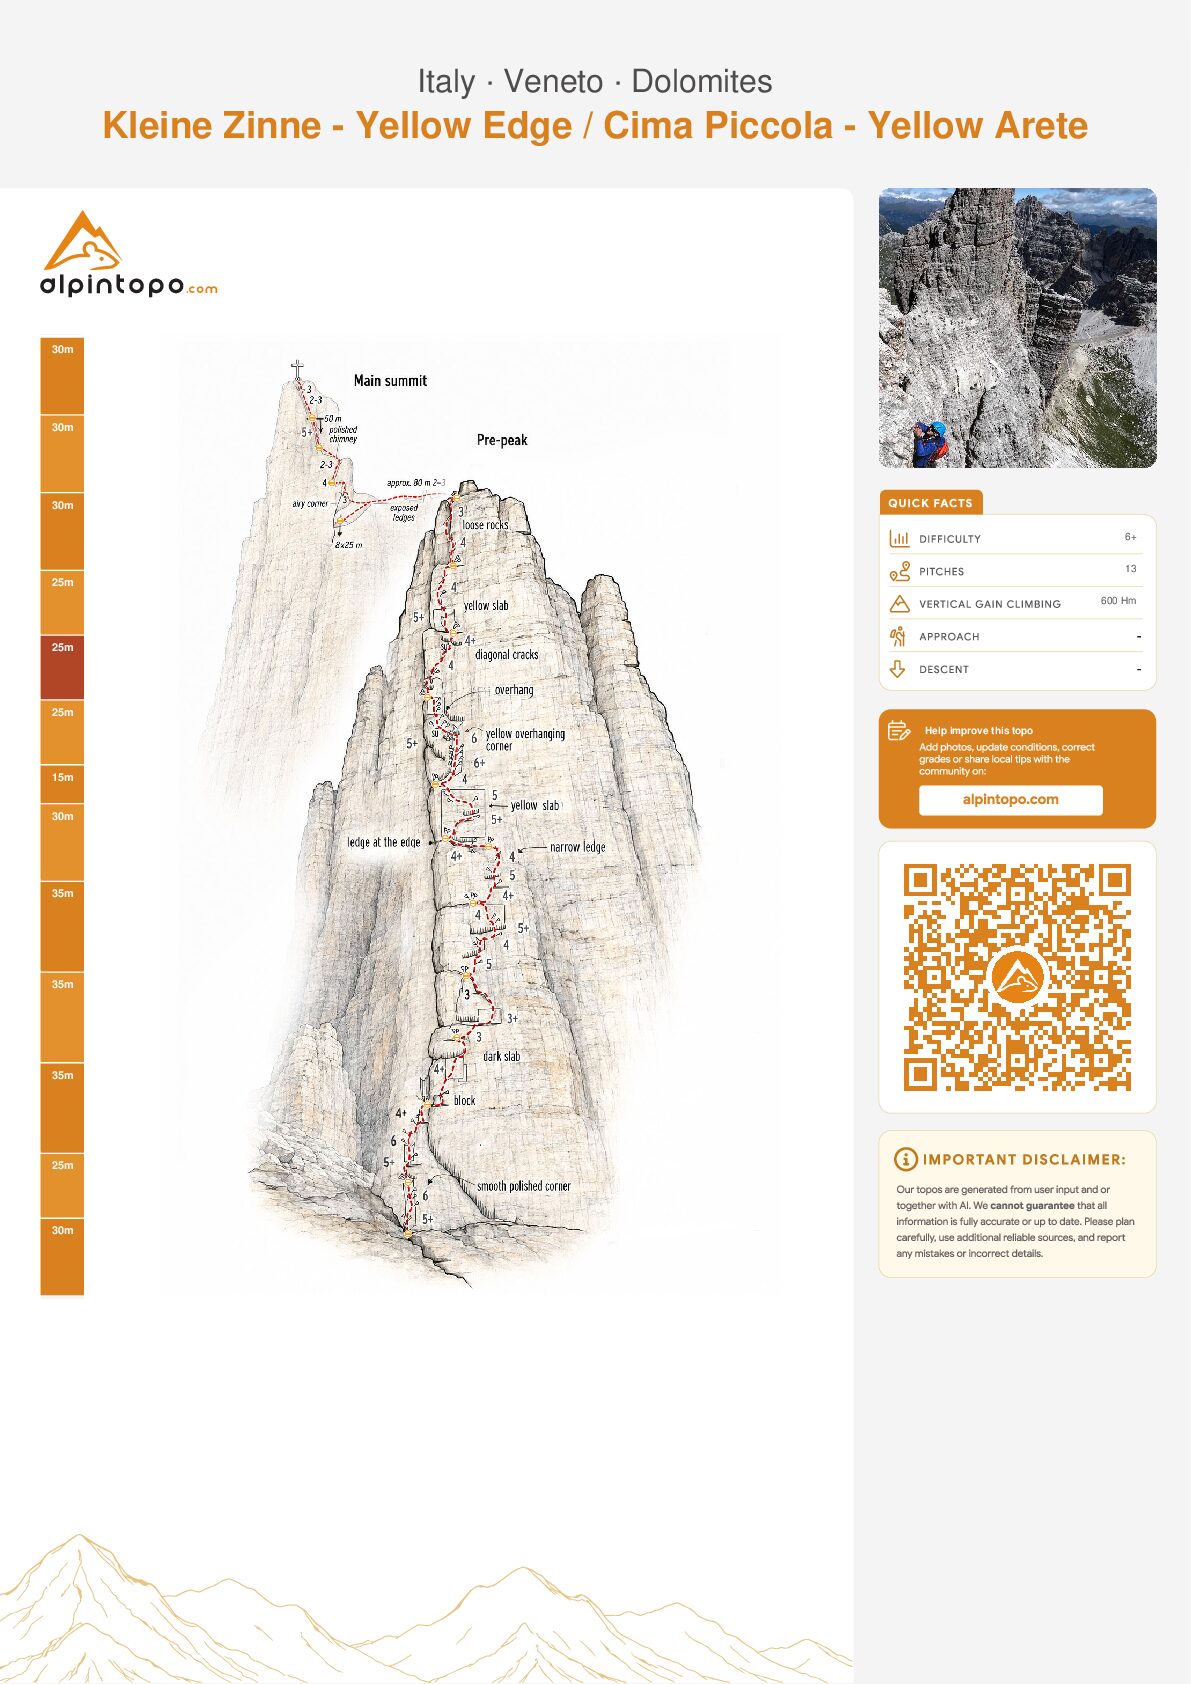
Finishing the topo publishes it to the route page and into its printable PDF, beside the quick facts and the photos — on paper or on a phone.
The editor opens from a route: pick the one you want to draw for and start from the topo section on its page. It costs nothing, and every topo you finish makes that route usable for someone else.